How to build a gaming PC — and why you should
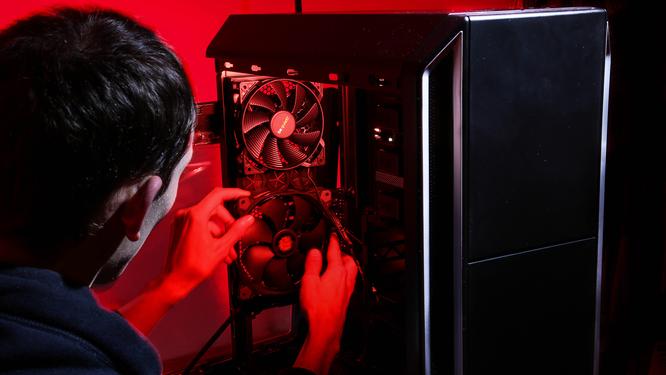
Building a gaming computer may sound daunting — like a hobby reserved for those who know a lot about computers and are tech-savvy. But the truth is, with a bit of time, patience and willingness to learn, anyone can build a computer.
Sure, it’s intimidating, but so is anything else that forces you to step outside your comfort zone and learn a new skill. Just be careful with how loudly you brag about your new PC-building skills; you don’t want to turn into the on-call tech support agent for your friends and family.
We recently built not one but three different gaming computers and put them to the test — and we learned a lot along the way.
Just like any other DIY project, building your own gaming rig will save you some cash, and you’ll learn a ton about all the parts and pieces that go into a computer. For example, by the end of the build process, you’ll know what a motherboard is and why you need to familiarize yourself with its BIOS (that’s the operating system that runs on a motherboard, and allows the CPU, GPU, RAM and other components to communicate with each other).
In addition to saving money and gaining a learning experience, you’ll find gaming on a PC is just fun. Not only do you get to choose between a keyboard and mouse versus a controller, if that’s more your speed, but you’ll have access to game catalogs from a number of different platforms, not just Sony’s or Microsoft’s game library. That means you can download games from Steam, Origin, Blizzard and Epic Games, just to name a few.
Finally, depending on your budget, you can put together a gaming PC that will far outperform any gaming console on the market right now, and it’s not even close. Or, if you don’t care about frame rates and gaming in 4K, for around $500 you can build a gaming PC that offers similar performance to consoles you’d buy — with the added benefit of being upgradeable, whereas if you buy a gaming console, you’re stuck with whatever’s inside.
Enter the search query “gaming computer” into Google Images and you’re sure to find an unlimited supply of PC towers with colorful lights and huge fans. It’s true, most gaming PCs have some form of LED RGB lighting, and keeping the system cool is crucial for longevity and performance. But at the end of the day, those two items alone don’t make it a gaming PC. It essentially boils down to graphics and processing power. But even then, the line between a normal computer and a gaming computer is rather blurry.
Every computer, whether it’s a Mac, Windows, Chromebook or Linux device, has some form of graphics processing unit. The GPU is how your computer is able to display your desktop, app icons, or any sort of image on the display.
There are two types of GPUs: integrated and discrete. An integrated GPU is built into the computer’s CPU, or main processor, and shares resources like memory with the CPU. A dedicated GPU is a separate card, sometimes called a video or graphics card, that has its own memory (VRAM).
A discrete GPU is far more powerful than an integrated GPU, and in nearly every gaming PC build, you’ll find either an AMD or an Nvidia GPU. There are exceptions, as we’ll talk about in a minute, however. Some integrated GPUs are good enough (barely) for basic gaming.
In order to complete your first build, you’re going to need some supplies. Here’s a list of the components you’ll need to purchase to put together your own PC.
Outside of everything that goes inside the tower, you’re going to need a valid Windows 10 license, a monitor, keyboard, mouse and speakers. Or, if you don’t want speakers, you can always use headphones.
These parts will add to the overall cost, but are things you likely already have on hand, with the exception of the Windows 10 license. If you’re a student, you might be eligible for an education discount on a license.
You’re also going to need tools
You’ll want to have some tools on hand in order to make the build process as streamlined as possible. A normal screwdriver works, but you’ll find that some of the screws you’ll deal with are small and fit in very narrow spots.
So instead of using tools you can find at your neighborhood hardware store, we recommend (and use!) IFixit’s Essential Electronics Toolkit. It’s $24.99 and includes all sorts of nerdy tools and magnetic screwdriver attachments, most of which we used during our builds. Trust us when we say you’ll be glad you have the right tools for the job.
You’ll also want to get a $7.99 anti-static wrist strap. This will prevent any static buildup from ruining any of the components you touch during the build.
Having some sort of overhead light or mountable flashlight isn’t a bad idea, either. We struggled with lighting inside the tower.
To be clear, when we started thinking about building a gaming PC of our own, we knew next to nothing about the process. We had a thorough understanding of the internals, but going from a budget to a parts list to actually putting it all together was a massive undertaking. To be honest, it was intimidating, and there were many mistakes along the way.
So, we turned to the internet. Here are some of the most helpful tools and communities we found when it came to creating a build, finding guides and getting help:
The subreddit Build A PC is full of like-minded PC builders who are either looking for advice on their proposed builds, talking about their experiences, or asking for help when they get stuck. We spent countless hours scrolling through the various posts and soaking in as much info as possible, and even posted our own build for critiquing.
There’s another subreddit dedicated to easing the research aspect of building a gaming PC, called Build A PC For Me. Create a post there using the template, which includes your budget, timeframe and other important details. You don’t have to stick with what the comments suggest for you, but you can use them as a starting point.
Hands down, the most beneficial tool we used throughout the process is PCPartPicker. You can go through and view builds that other users have created, and read through their reviews, if they’ve added them. The prefilled builds and examples are fantastic starting points that you can then copy to your account and tailor and customize to fit what’s in stock, within your budget, or if there’s a specific component you’d rather use.
But what makes PCPartPicker so useful is not just that it shows you pricing and inventory for popular online stores, but that it will tell you whether the components you’re adding to your build are compatible with one another. For example, if you have a motherboard designed to work with Intel processors in your build and then you add an AMD processor, it will present you with a big warning that the two parts won’t play nice.
Newegg just launched a similar section on its site. The Custom PC Builder tool has some profiled builds you can customize, or if you prefer you can start from scratch.
Newegg’s tool is far more streamlined and easier to use, but it also limits you to buying only from Newegg, instead of finding the best deal possible.

Either way, use these tools to make educated buying decisions instead of just guessing.
Every build is different, but the main steps consist of attaching the CPU and RAM to the motherboard, then installing the motherboard into the case. Next you’ll install the fan, storage, and power supply. Finally, you’ll begin routing and connecting all of the cables to the motherboard. There are connections for each fan, front panel ports and audio ports.
Here’s what we suggest doing: Set aside a few hours to complete your build and take a break anytime you feel yourself getting overwhelmed or frustrated. YouTube is your best friend for this kind of situation. More specifically, go to YouTube and search for your motherboard along with the word “build.” For example, “ASUS X570-I ROG Strix build” locates this video, that walks through all of the connections and installing the CPU and its fan.
You can find similar videos for nearly every motherboard, which should help you get through even the most confusing parts of the build.
Lastly, inside the box your motherboard ships in, there will be a book. Keep that book. Don’t lose it. It will help you figure out which cables plug into which connectors on the board, and will even walk you through the BIOS.
The final step of any build is connecting it to your monitor, keyboard and mouse, then powering it up and installing Windows. You’ll need to create a Windows 10 Bootable USB, which, ironically enough, you’ll need to do on another Windows 10 computer. Microsoft has a tool that walks you through the process. Just make sure you’re using a USB drive with at least 8GB of storage.
When this endeavor started, we had plans of building one gaming PC. However, it slowly morphed into a project of building three different gaming computers with different use cases and budgets. It’s been a long and slow process, due to the limited stock of computer components, but we finally have three gaming builds up and running.
Build No. 1: $800
NZXT’s Mini-ITX H1 has a small form factor that’s perfect for a small desk or a situation where space is limited. Included in the case is a power supply and a liquid cooler for the CPU.
Our favorite part about this case isn’t its size, but the fact that nearly all of the internal wiring was already routed for us. All we had to do was install the motherboard, tighten a few screws, and finalize the connections. It was the quickest build of the three.
You can fit a discrete GPU into the case, but we opted to rely only on the AMD 3200G’s integrated GPU, which does a respectable job of providing around 60 frame-per-second gaming in Fortnite and Call of Duty’s Warzone battle royale mode, as long as you’re willing to play around with the game’s graphical settings.
For example, letting Fortnite set its own graphic settings at 1080p resulted in an average frame rate of 27 FPS. After we adjusted the settings and dropped the resolution to 720p, we were able to get the frame rate up to 56 FPS.
Keep in mind, anything between 30 and 60 FPS is considered acceptable. But the closer to 60 FPS, the better.
We also ran our standard suite of benchmark tests on all three builds, giving us quantitative data to compare the different computers. Build No. 1 scored 3,548 in PCMark 10’s Extended benchmark, which mimics common workflows and tasks. That score is close to the Galaxy Book Flex, a laptop that we found more than capable of keeping up with our nongaming needs.
With Geekbench 5, this build scored 870 in the single-core and 3,065 in the multi-core tests. Those scores are lower than the Book Flex results, but our personal experience in testing this particular build is that you shouldn’t have any issues with performance when it comes to browsing, dealing with spreadsheets or managing your email inbox.
Build No. 2: $1,100
Build No. 2 takes a basic approach to the case, using NZXT’s entry-level ATX case that comes with two fans, and once again relies on the CPU’s included fan. The Aorus Elite motherboard adds RGB lighting, adding some flair to the build and giving it that true gaming PC look.
Performance-wise, it’s a significant upgrade over Build No. 1, thanks in part to Nvidia’s RTX 2060 Super GPU and Intel’s i5 processor. Using high settings across the board in Fortnite and Warzone, we saw an average of 132 FPS and 138 FPS, respectively. For Warzone, that includes leaving Raytracing enabled, a feature in RTX-series GPUs from Nvidia that adds a more lifelike look to graphics.
Benchmarks also showed a significant improvement in performance, with a PCMark 10 Extended score of 7,486. The Geekbench 5 single-core performance scored 1,098 and multi-core scored 5,408.
Build No. 3: $1,575
The bulk of the price difference between this one and the second build comes down to the GPU, NZXT’s H510 Elite case, and upgraded AIO cooling thanks to NZXT’s Kraken Z63. Not only does it run cool, it’s so much quieter than the stock AMD fan that came with the 3600 processor.
This is the fastest build of the three, with Fortnite and Warzone both having an average frame rate of over 150 FPS. Benchmark tests back up the performance increase we experienced, with a score of 8,432 in PCMark 10 Extended, and single- and multi-core scores of 1,217 and 6842, respectively, in Geekbench 5.
Keep in mind, the beauty of building your own gaming computer means you can mix and match parts to fit your budget. For example, if you had a $500 budget, you could do something like this:
$500 build example:
The sky’s the limit when it comes to building your own computer, but these four builds are fantastic starting points for anyone who is unsure of what they’ll want to do. And we’ve personally used and tested the three main builds, instead of simply compiling a list based on what should theoretically work or what hits a certain price point.
Right now, inventory and prices are all over the place as people rush to buy components and build their own computers, so be patient and flexible with substitutions when shopping for your build.
Take your time during the actual build process, and don’t make the same mistakes we did — like bending the pins on an AMD processor, forcing us to buy a second one. When you run into any issues that YouTube can’t guide you through, don’t be afraid to go to sites like Reddit and ask for help. The Build a PC group is friendly and helpful.
Most of all, have fun with it.
Note: The prices above reflect the retailer’s listed price at the time of publication.


