How to Get the Windows 10 Context Menu Back in Windows 11
Windows updates are always a love/hate journey. While the new features are great, there’s something to be said for that familiar look or feel.
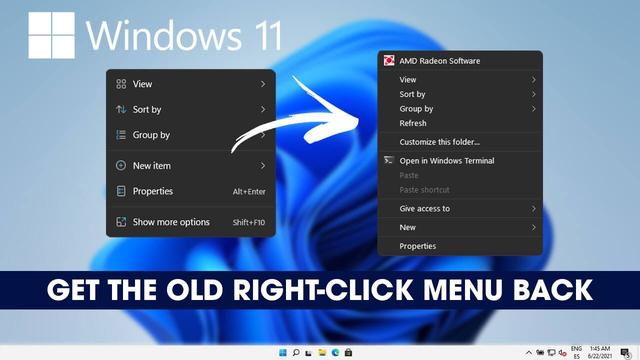
The classic context menu, admittedly, does provide more options and a lighter feel than the new one. Those unhappy with the new menu haven’t been shy about letting Microsoft feel their displeasure. Some have said it’s tedious to click the new “More options” menu to get some of the same functionality thatWindows 10had with fewer clicks. Some users are also complaining about the fact that the copy, cut, paste, rename, and other menu options have been replaced with icons.
Whatever issue you may have with the new context menu, you should know that it’s fixable. You can return the new context menu to the old one at any time by following these steps.
How to Get the Classic Context Menu on Windows 11
1. The only way to change Windows 11’s context menu to the Windows 10 version is through the Registry Editor. To open it, press Windows + R on your keyboard. Type “regedit” on the Run window and press enter.

2. On the left navigation pane, navigate to Computer > HKEY_CURRENT_USER > Software > Classes.
3. Look for the CLSID folder and right-click it. A menu will appear after you do so.
4. Click New on the menu shown, then select Key. A new blank folder under CLSID will pop up on the left navigation pane.
5. Rename the new key to {86ca1aa0-34aa-4e8b-a509-50c905bae2a2}.
6. Create another key under the key created with steps 5 and 6. Name this key “InprocServer32”.
7. Open “InprocServer32” and double-click on “Default” at the right pane. A window should appear after you do this step.
8. Disregard the fields in the opened window, and just click Ok.
9. Restart your PC. Once your computer reboots, the old context menu should be available again.


