8 Best Ways to Fix Windows 10 Ethernet Keeps Disconnecting
On Windows 10 computers, both wired and wireless connections come with their respective problems. However, compared to Wi-Fi, ethernet connection is a lot more stable and less prone to malfunctions. But the possibility does exist. If your computer’s ethernet connection keeps disconnecting and reconnecting at intervals, we’ve compiled a list of solutions that’ll help put an end to the disruption.
The cause of this network disruption is quite numerous and may vary from device to device. However, we’re certain that at least one of the troubleshooting methods below will work the magic for you. Let’s get to it.
1. Replace Ethernet Cable
If, by chance, your computer has multiple ethernet ports, try the ethernet cable with other ports and see if you get a stable connection. Similarly, you could use a different ethernet cable if you have a spare. Using a broken, damaged, and counterfeit ethernet cable could affect the connection performance. If you suspect that your PC’s ethernet port has gone bad, we recommend using a USB-to-Ethernet adapter.
Additionally, you should also check that the computer’s ethernet port is dirt-free. Alien material like dust, debris, etc. could cause connection interference. One last thing: use the ethernet cable on a different computer. If the connection is stable on the test device, the issue is most likely software-bound. In that case, check out subsequent solutions in the section below.
2. Run Network Troubleshooter
Windows has a built-in tool that automatically diagnoses network-related issues and recommends troubleshooting solutions. If you aren’t making headway with getting a stable Ethernet connection, let the Network Troubleshooter help you find the problem (and solution).
Step 1: Launch the Windows Settings menu and select ‘Update & Security.’
Step 2: Navigate to the Troubleshoot section.
Step 3: Scroll to the ‘Find and fix other problems’ section and click Network Adapter.
Step 4: Tap the ‘Run the troubleshooter’ button.
That will launch the Windows Network Adapter troubleshooter and scan your computer for glitches responsible for the faltering ethernet connection.
Note: Make sure the ethernet cable is plugged to your computer before running the Network Adapter troubleshooter. Likewise, ensure that the other end of the ethernet cable is also properly plugged into the router.
Step 5: Select Ethernet from the list of network adapters to diagnose and tap Next to proceed.
The troubleshooter will diagnose your computer’s ethernet connection (this might take a while) and reveal the problems detected.
Follow the recommended solutions that the troubleshooter proposes, and your ethernet connection should be up and running in no time.
3. Modify Power Management Settings
In a bid to conserve power, your computer could temporarily disable some device functionalities. This is common practice with the Windows OS, particularly on battery-powered laptops. This also happens when Battery Saver is enabled.
Step 1: Launch the Windows Quick Access Menu (Windows key + X) and select Device Manager.
Step 2: In the Network adapters menu, right-click your PC’s ethernet adapter and select Properties.

Step 3: Navigate to the Power Management tab.
Step 4: Uncheck the ‘Allow the computer to turn off this device to save power’ and tap OK.
Restart your PC and check if the ethernet connection is now stable.
4. Disable Static IP for Ethernet
Using a static/fixed IP address on your PC comes with its benefits. However, having the wrong static IP configuration/information on your ethernet network might result in connection problems. Try disabling static IP for ethernet connections on your computer and see if that helps with this issue.
Step 1: Launch the Settings menu and select ‘Network & Internet.’
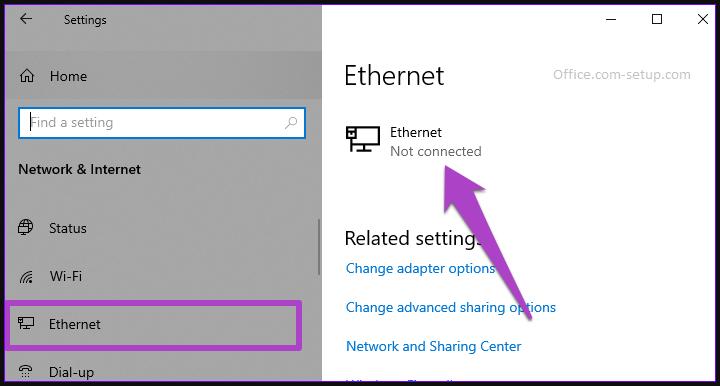
Step 2: Next, go to the Ethernet menu and tap Ethernet.
Step 3: Scroll to the IP settings section and make sure the IP assignment is set to Automatic (DHCP).
Step 4: If otherwise (Manual IP assignment), this means you’re using a fixed/static IP address. Tap the Edit button to modify your PC’s ethernet IP configuration.
Step 5: Tap the Manual drop-down option.
Step 6: Select Automatic (DHCP) and save the changes.
5. Update Ethernet Driver
You should expect to run into connectivity issues if your ethernet driver is missing, corrupt, or outdated. Follow the steps to update your computer’s ethernet driver.
Step 1: Launch the Windows Quick Access Menu (Windows key + X shortcut) and select Device Manager.
Step 2: In the Network adapters menu, right-click your PC’s ethernet adapter and select Update driver.
Step 3: Next, select ‘Search automatically for updated driver software.’
The Device Manager will scan the internet to check if there’s an updated version of your computer’s ethernet adapter. You’ll be prompted to download any available updates found after the scan is completed. Install the new driver, restart your computer and check if the intermittent connection disruption persists when connected to an ethernet cable.
If your ethernet driver is up-to-date or the issue persists even with the updated driver, try the next troubleshooting solution
6. Disable LAN Proxy Settings
Step 1: Launch the Run dialog box (Windows key + R), enter inetcpl.cpl into the dialog box and click OK.
Step 2: Navigate to the Connections section and click LAN settings.
Step 3: In the Proxy server section, uncheck the ‘Use a proxy server for your LAN’ option and tap OK.
You can re-enable the proxy settings if the ethernet connection still keeps disconnecting.
7. Check Router’s DHCP Settings
Thanks to the Dynamic Host Configuration Protocol (DHCP), your router can assign individual IP addresses to connected devices on-the-fly automatically. You might encounter difficulties connecting your PC via ethernet if the router’s DHCP server settings are disabled.
Go through your router’s settings menu and make sure the DHCP server is enabled or set to automatic.
8. Update Router Firmware
Sometimes, the problem isn’t your computer or the ethernet cable, but rather the ethernet router. Some Windows 10 users whose ethernet kept disconnecting could fix the issue by updating their router’s firmware.
You should try it too. Go to your router’s control panel or settings menu and check for available firmware updates.
Stabilize the Connection
If the ethernet network keeps disconnecting after trying all the solutions above, there’s also a possibility that the router is bad. Try using a different port on the router and see if it stabilizes the connection. If that doesn’t yield any results either, we recommend contacting the router manufacturer or an experienced technician to check it out.
Next up:Check out 5 ways to solve the “Unidentified network – no internet access” error that pops-up when connecting to the internet on your Windows 10 PC.


