How to Set up and Use Virtual Desktop on the Oculus Quest 2
The Oculus Quest 2 is a virtual reality headset capable of leaps and bounds. With Facebook changing its name to include its VR division, even more, this capability will only improve in the future. If you use your Quest 2 for playing SteamVR games, you already know sometimes the official Air Link can cause problems. However, there is a pretty handy solution in the form of Virtual Desktop for the Oculus Quest. Working in the same principle as Air Link, Virtual Desktop is an app that essentially streams your PC to the Oculus Quest 2. This ensures you get to control your computer and play games from it all the while wearing your Quest. But how does it work and how do you set it up? Well, we answer all that and much more in this handy guide we have created for you. So keep on reading to learn how to set up and use Virtual Desktop on your Oculus Quest 2.
Set up and Use Virtual Desktop on the Oculus Quest 2 (2022)
While the guide to setting up your Oculus Quest 2 for Virtual Desktop is easy as pie, there are still some other aspects to it. If you want to see them all at a glance, use the table down below to do so.
Table of ContentsAs it goes with setting up anything, Virtual Desktop on the Oculus Quest 2 has a few key requirements users must meet before proceeding further. So if you’re someone eager to do so, hold your horses just for a bit more and go through the requirements below.
Note: we are assuming that you’ve already set up your Oculus Quest 2 for normal usage. If you haven’t, check out our guide on how to set up and use Oculus Quest 2.
As mentioned above, Virtual Desktop is a software that mirrors your entire desktop for not only browsing but playing intensive VR games of all kinds. Therefore it goes without saying that you will require hardware that is capable of playing and streaming all these processes at the same time. To get a better idea of what key specifications your computer must have, feel free to go through Facebook’s Quest 2 compatibility page. If you believe you meet these requirements, keep on reading.
Facebook’s official software called Oculus Link (Free) is the one that allows a seamless wired/wireless connection between a Quest 2 headset and a PC. Therefore, before you begin it is advised you download and configure it before we begin. Thankfully, we have already done the job for you and created a dedicated guide on how to play SteamVR games on your Oculus Quest 2. This will also be useful if you want to play Steam games on your Quest 2 so make sure you have that set up and ready to go. Go through it and learn how to set up Oculus Link easily.
Complementing the high hardware PC requirement, Virtual Desktop in order to run efficiently also requires a fast and reliable Internet connection. The official Virtual Desktop page on the Oculus Quest store puts the requirement as a 5Ghz AC Wi-Fi Router needed. Moreover, it is also required that this router itself is connected to your PC using an Ethernet cable for a seamless connection. Furthermore, make sure both your PC and the Oculus Quest 2 are connected to the same Wi-Fi network. Make sure you have this point pinned down before you proceed any further.
Since we will be using the Oculus Quest 2 wirelessly instead of hooking it up, we will require a good amount of battery charge to stream and play games from Virtual Desktop. Make sure to fully charge your headset so you don’t find yourself reaching for the socket in between your session.
Now that we have all the important points covered, we can begin setting up Virtual Desktop for the Oculus Quest. Now do be aware that you will require to download and install Virtual Desktop on both your PC and the Oculus Quest 2. Since VD is a paid app, you will first need to purchase it from the Oculus Store from your headset itself.
Note: Do not purchase the Steam or the Rift version since that is not the one we will be using. Make sure to buy Virtual Desktop from the Oculus Store itself.
Go ahead and get Virtual Desktop ($19.99) from here and install it on your Quest 2. After that keep reading as we first set it up on our PC.
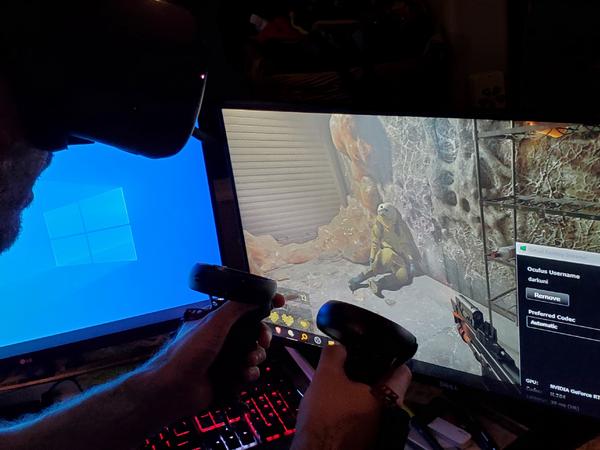
Let’s begin by downloading and installing the Virtual Desktop Streamer app (Free) on our PC. This app will be the one responsible for essentially streaming your desktop to the Oculus Quest 2 itself. Depending on your platform, click on the relevant link, let it install, open it and then follow the steps below.
1. Upon starting Virtual Desktop, you will see the Accounts screen asking you to input your Oculus Username. This is NOT your email address but the name you use on your Quest 2. If you’re still unsure, then put on your headset and see the name from the Quick Settings tab. Once done, input that in the VD text box and press Save.
2. Once your username is set, you’ll see the screen below.
And that does it for setting up Virtual Desktop on your PC. Pretty easy right? Keep VD running in the background and keep on reading to set the same up on your Quest 2.
Note: As mentioned before, make sure both your computer and the Oculus Quest 2 are on the same Wi-Fi network to use Virtual Desktop.
Now that we have set up Virtual Desktop on our PC and bought the same on Oculus, it’s time to connect both together. Start up Virtual Desktop on your Quest 2 and follow the steps below to proceed.
1. As soon you open up Virtual Desktop, you will go through a small tutorial telling you just a bit about the UI.
2. You should see your computer connected to the Oculus Quest 2 in the computers tab. If you don’t or cannot connect even after trying, that means your network is not stable enough. As you can see below, even our temporary network is a bit unstable but still can stream.
Your ideal connection should have the following markers to ensure an amazing experience:
If your connection meets the above numbers then you should be able to stream and play Virtual Desktop on your Oculus Quest 2 easily. If not, then we advise figuring out a better connection.
Let’s also go through some Settings so we get familiarized. Depending on your type of hardware and network, Virtual Desktop would have already applied the relevant settings for you by default. The most important of these settings are the two below.
Since our PC is the one doing all the heavy lifting, it’s natural that the GPU power will be pulled from it. Depending on what GPU you have, make sure to select the relevant setting. You can even perform a bit of customization. Fortunately, VD makes the job very by already providing examples. For instance – We chose High instead of Medium since our PC is equipped with an RTX 3070.
For those committed to having the highest image quality possible, the VR Bitrate setting is one that complements the above setting. You can crank this setting up to achieve better textures but remember that the latency (lag) itself might also increase.
As for the rest of the settings, you can go about and experiment with them to achieve a customized experience. However, in our experience, we found that the default VD settings work extremely well. We would advise running with them first and fine-tuning only if you encounter problems.
Now that Virtual Desktop is all set and running on your PC and Oculus Quest 2, let’s get right into the action. Thankfully, even here Virtual Desktop makes it extremely easy to go about it. Simply follow the steps below.
1. On your Virtual Desktop, find and click on the ‘Games’ tab.
2. Here you will see all your games including the ones from Oculus and Steam neatly divided into categories. Virtual Desktop automatically fetches all the VR games from your computer and places them all here. However, do be aware that if you don’t have the Oculus or SteamVR software installed beforehand, you won’t be able to see your games here.
The reason we are not using that tempting Launch SteamVR button is because, not only does Virtual Desktop take an extra step out of opening Steam Home but automatically optimizes all games you run from it. This way you get to play games that have been polished just a bit further with most compatibility issues fixed.
3. Simply click on the game you want to play using your Quest 2’s controller and it will launch immediately.
And it’s that easy! Virtual Desktop streamlines the entire process and ensures gaming is painless on your Quest 2.
Now that you have successfully set up Virtual Desktop on your Oculus Quest, here are two important pointers you should keep in mind to make your experience a smooth one.
Unlike the wired experience, software like Virtual Desktop relies on complete Internet connectivity. As such, it is important the level of Wi-Fi signal strength is extremely important. Whenever you find yourself using Virtual Desktop on your Oculus Quest, make sure you are in close proximity of your router to ensure there’s no signal loss. Moreover, also make sure there are no physical obstructions like any walls or barriers in the way too. Following this will make sure your streaming remains effortless.
We know we mentioned above to keep your Oculus fully charged before beginning but this tip is for the long run. Wireless streaming of desktop and more importantly games can take a heavy toll on your Quest 2. While the headset’s battery can last around three hours, you might be pulled from the experience nevertheless. To avoid such a shortfall, make sure your Oculus Quest 2 cable and charger are nearby so playing Virtual Desktop isn’t interrupted.
Use Virtual Desktop on the Oculus Quest 2 and Have Fun
We hope you have an amazing time using Virtual Desktop alongside your Oculus Quest 2. Once you get bored of your VR games, you can always try these best VR experiences for a change of pace. So, how’s your experience using Virtual Desktop? Let us know in the comments below.

